SEC20-WK1: Introduction to Graphic Design and Principles.
Question 1: What is Graphic Design?
Graphic Design is the art of processing and creating interesting content, so that it provides appeal, and conveys messages/information to consumers either in the form of images, text or colour.
Question 2: Pick any three of the principles of Graphic design and talk about them based on your level of understanding.
I chose 3 graphic design principles such as CONTRAST , DOMINANCE, and BALANCE
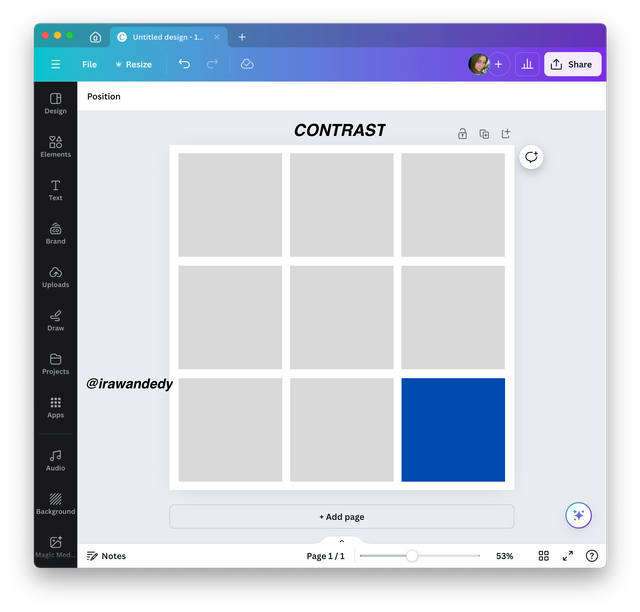
This principle aims to provide a difference between the elements in the displayed design, the important topics that you want to highlight will be more dominant, and dynamic and become the main concern of consumers.
To apply it in graphic design, you can do it by highlighting the colour, size, thickness and interesting letter combinations.
Look at the picture on the side, I drew 9 boxes with 2 colours (8 grey rectangles and 1 box at the end is blue)
This is what is meant by applying contrast in the design that is made.

The principle is to be able to create elements in the design that stand out more so that they become the focus/attention of the audience as the target of the published design. This principle is expected that the message to be conveyed can be the main focus, applying it can be done through the size of the element, its colour, its position, and its shape.
From the picture on the side, you can see 3 elements that have different colour characters, the first element in the front looks more prominent with a dark blue colour, then behind it a light blue colour and followed by a light grey colour.

The purpose of applying the principle of balance is to display a design that looks neat and comfortable to look at by the audience so that the message to be conveyed can be well understood by the audience.
I give an example in the image on the side, note that the two elements have the same dimensions between elements 1 and 2.
Question 3: Practically show us how to make the graphical image below.
I will try to complete the task as conveyed by the instructor because in the learning guide using the mobile-based canva application, I also use a similar application but the iOS-based computer version.
Here are the steps for creating graphic images:
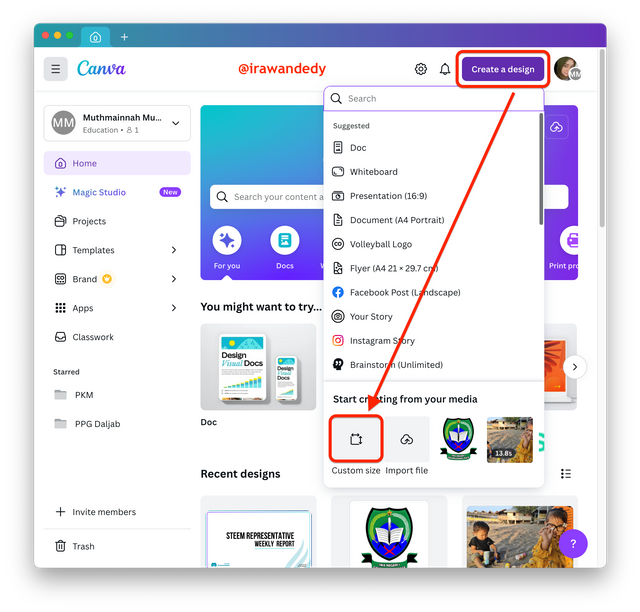
The first step can be seen in picture 1, what needs to be done is to open the Canva application select a new worksheet, select Create a design, and then set the paper size as specified. Pay attention to the arrow in picture 1, I chose to use custom size to determine the size of 1080 x 1080 px.
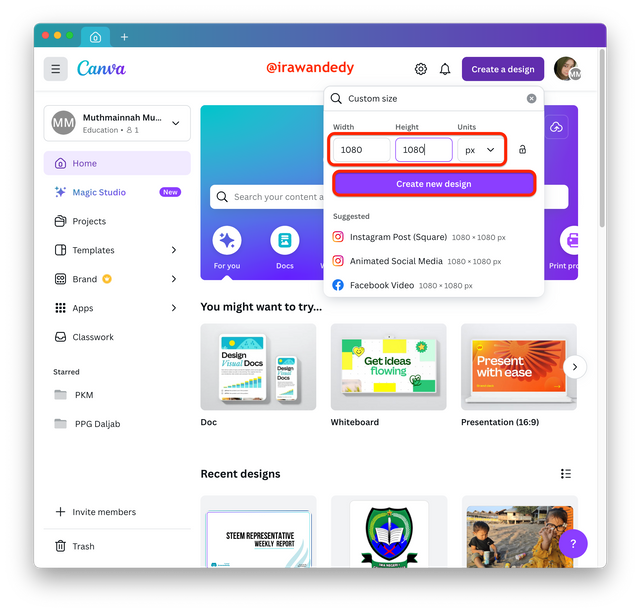
In the custom size column, fill in the desired size, I will use a page with a size of 1080 x 1080 px, after the width and height are filled with the same size, namely 1080 x 1080 px, the press create a new design. See the results in pict. 3.
However, you can also choose the available sizes such as the Instagram template with the same dimensions as explained by the instructor.
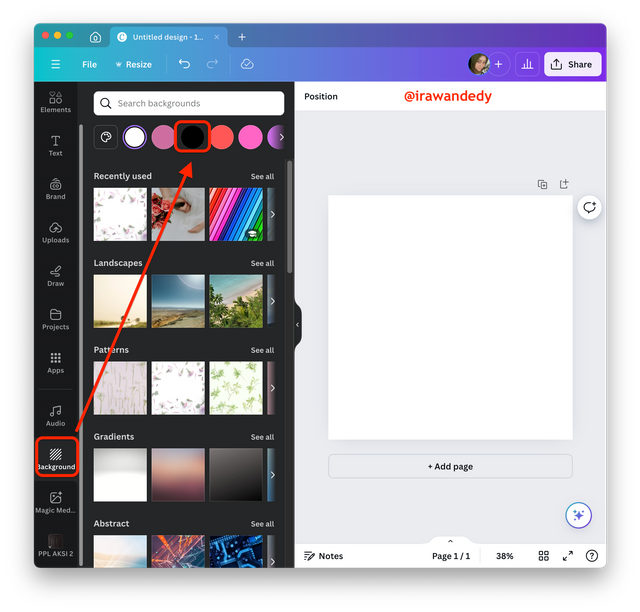
Before starting the main task, first, change the template background from white to black, here's how: scroll through the list of available tool menus, and select background, this application will provide a variety of desired colour choices, pay attention to the arrow in image 3.
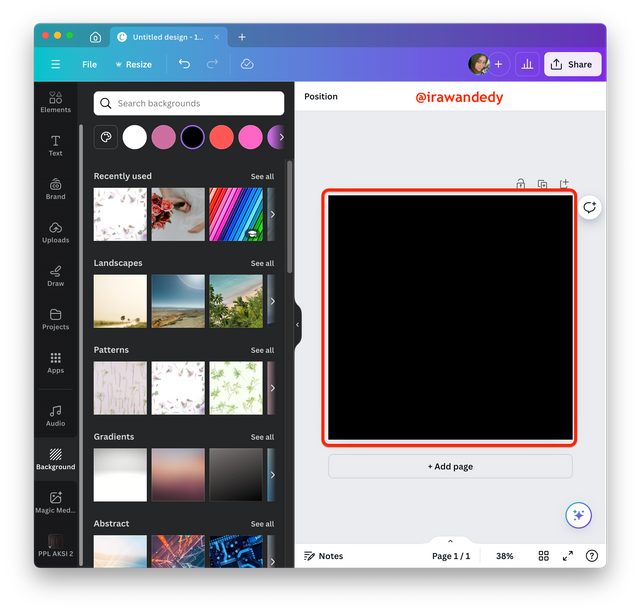
After selecting black, the background will change colour according to the type of colour selected, see image 4.
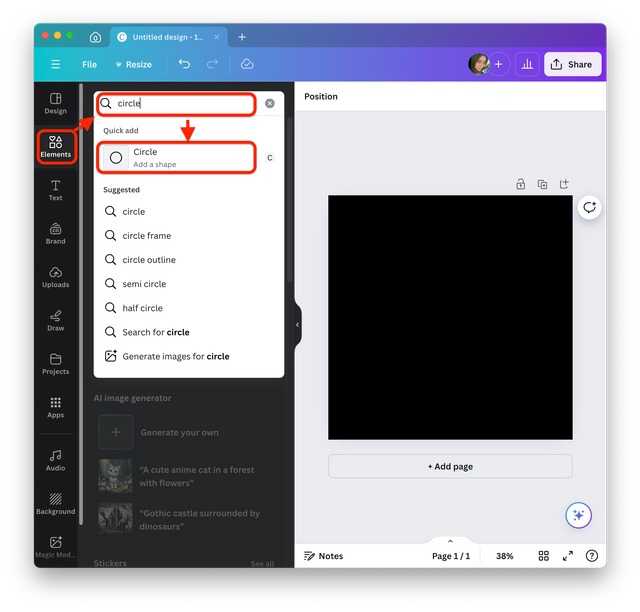
The next step is to create a circle, follow the guide in image 5, start by selecting the element, then in the search column type "circle".

Adjust the circle size on the available template, then change the color to white which is one of the principles of graphic design. to change the colour, see image 7.
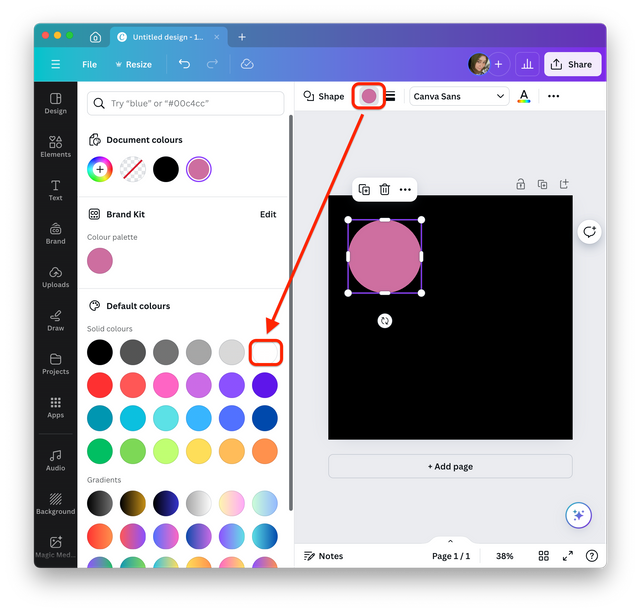
Activate the circle whose colour you want to change, then select the colour you want to change. Figure 7 shows that I will change the light purple colour to white.
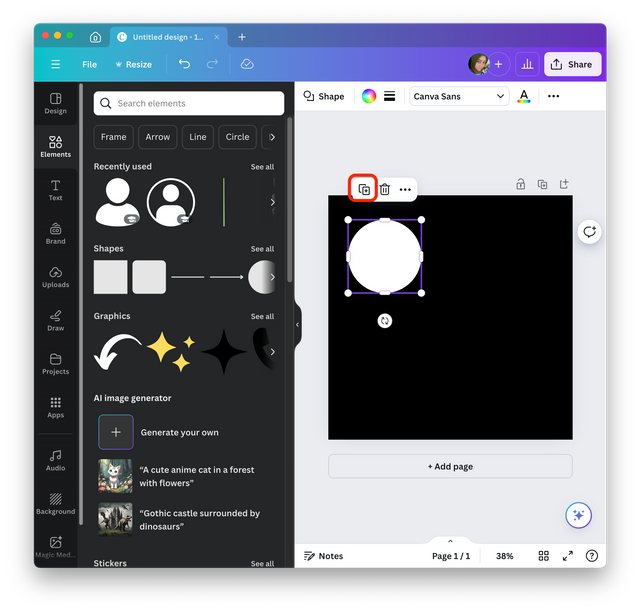
To duplicate a circle into more than 1, press the duplicate symbol that is available (red column in Pict 8), I duplicated it into 4 circles, so I pressed it 3 times.
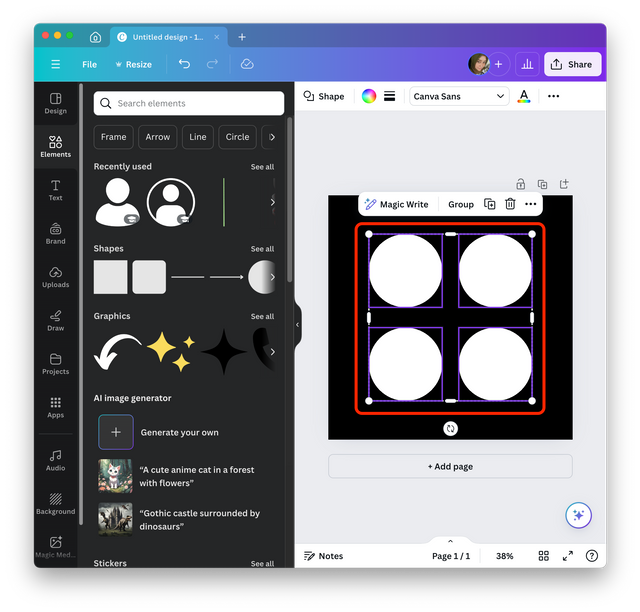
To arrange the four circles regularly, you can pay attention to the available guidelines, these lines function to place objects regularly between object 1 and others. I have arranged them and see the distance of the four circles has been arranged with the same distance.

The next step is to change one of the colours to yellow, you can adopt the color changing method as I explained in the previous step.
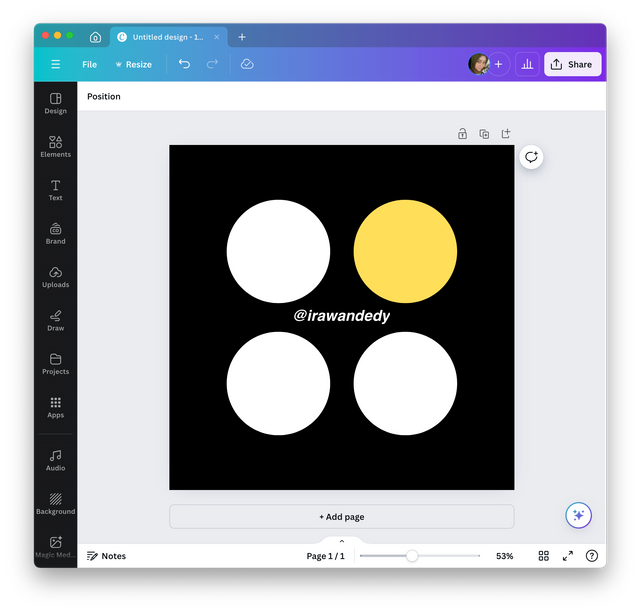
Well, you can see the final result of learning simple graphic images and this learning as a basis for learning graphic design. You can also use any application for drawing and I completed it according to the instructions and materials that were delivered by the teacher, namely using Canva. However, even though using other applications such as PS, AI, and CDR, the working principle is the same.
Thus the end of the task that I can present, hopefully, will be a reference and knowledge for me in the future, I invite @azwar82, @sofian88 and @klen.civil as masters of graphic design and architectural experts to join in this learning.
Wednesday, September 11, 2024
Best regards,
@irawandedy
Terimakasih atas undangannya pak, berbagai langkah cara membuat grafik yang telah anda buat bedasarkan petunjuk yang telah diterapkan dalan kontes ini, memang hasil akhir yang tersapat beberapa kolom sederhana akan tetapi luar biasa apa yang anda desain ini adalah ilmu dasar untuk pemula
Langkah demi langkah anda terapkan dalam mendesain grafik yang sempurna , beberpa tampakan garis panah sebagai langkah-langkah yang sangat mudah di mengerti.
Hello @irawandedy thank you for participating in this week's lesson. We have assessed your entry and we present the result of our assessment below.
Feedback:
• You have clearly defined Graphic design the way you best understand it,
I wish you had delved a little deeper into the concept. All the same, I appreciate the remarkable effort you put into it.
• Your selection on the principles of design is nice coupled with your comprehensive explanation and visual representation of those principle. It's quite commendable.
• Finally, your practical is quite detailed and comprehensive. From what I see, it was carefully done as every step all the way down to the final result was captured. I commend you for a job welldon. I hope you keep up with the energy level.
Regards
@lhorgic❤️
TEAM 5
This post has been upvoted/supported by Team 7 via @philhughes. Our team supports content that adds to the community.
Nice 👍
This graphic explanation from you is understandable, it helps one to know exactly what graphic is in a very simple language.
You step by step guide as well is clear enough to locate the different icons required to achieve this graphic design.
But from the look of your post, you know how to do it perfectly well even the graphics on your cover image looks really beautiful.
Wishing you success 👍
Thank you for giving me the spirit, I am just learning autodidactically. Hopefully I can learn more than anyone here
Oh that's interesting, wish you success 👍