No Mean Feat: Designing feet for my amigurumi figures
I first got into making amigurumi crochet figures a few years ago when I got the "Star Wars Crochet" kit as a gift. At the time the patterns in the book worked great for me as a beginner, but one of the simplifying things it does in the patterns is to construct the legs as a single big cylinder that you merely squeeze together in the middle to create the appearance of two legs. So even though I have positive associations with the patterns I don't want to make them as-is because I'd rather have actual separate legs. I've also done some other patterns that have separate legs, but usually those just end in rounded off cylinders at the end of the legs so it's tough to make them stand under their own power. So one of my personal goals has been to figure out how to make feet that work effectively, for both modified Star Wars patterns and for any original ones I can create for myself.
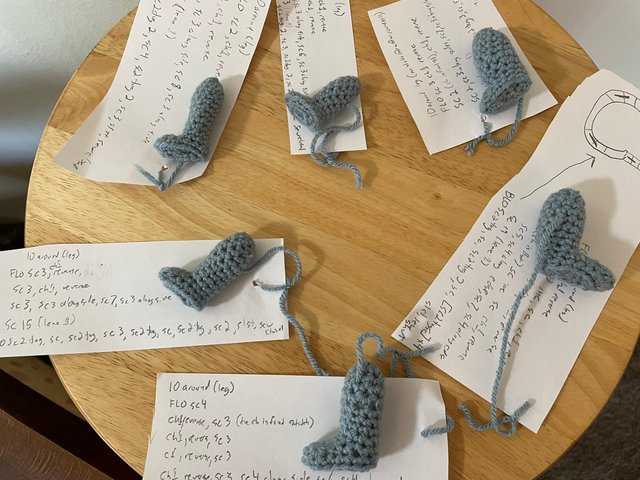
A lot of amigurumi crochet stuff is done "in the round" so it's a lot easier to do things that have radial symmetry than things that don't. For a while I thought I might be able to just fudge things by using the variations in stich sizes to make things that look more like feet (for example, a double crochet stitch is longer than a slip stitch) but I eventually figured I would need a more structural approach. So over the past several days I was experimented with expanding out a little flap using the more conventional "stich a row, reverse, stitch another row" from a section of cylinder that would be a leg, and then continuing down to make a foot. (My tip for anyone doing crochet design experiments: take notes about what you're doing, and attach them to the finished experiment -- the "I'm sure I'll remember what I did with that one" strategy never works for me).
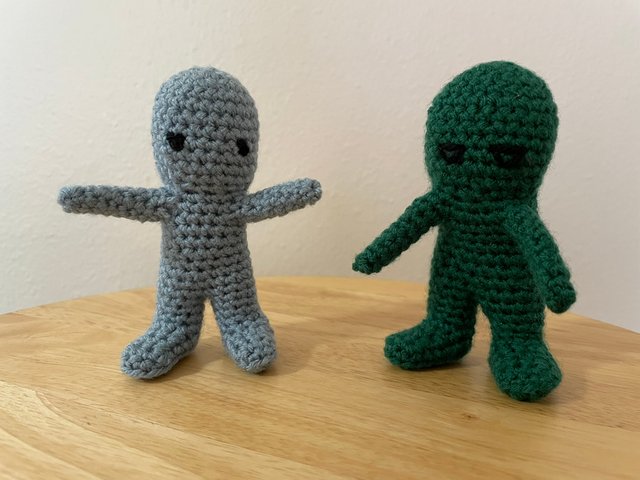
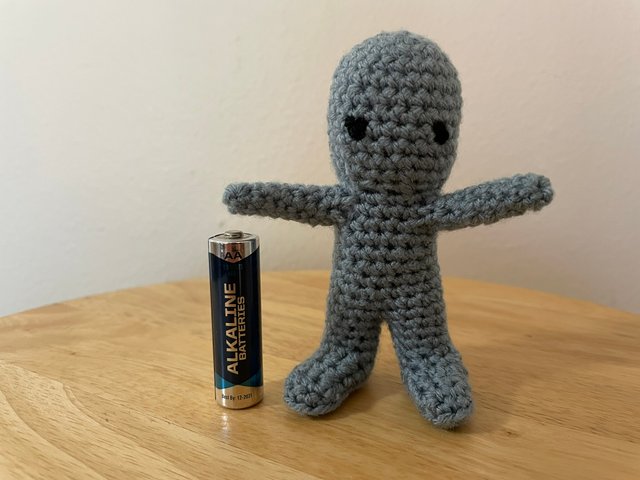
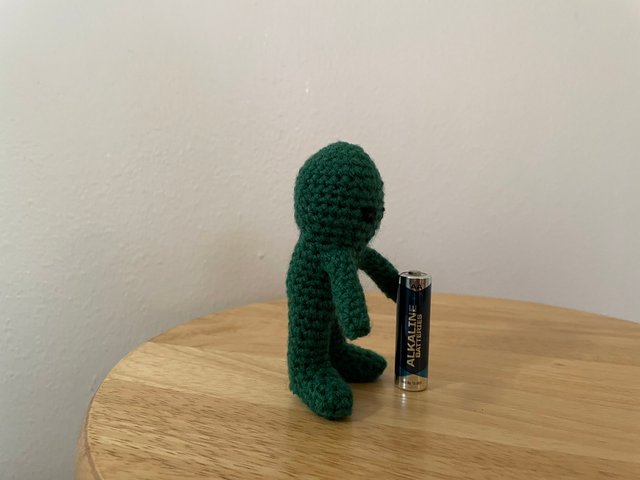
Once I had a foot design I thought could work I wanted to incorporate it into a full-body figure to see if it would actually stand up. I started by using the head and torso from the Han Solo pattern (but using just a single color, because it's only an experiment). I also don't like how the Star Wars patterns to the arms as separate pieces that are just sewn on at the end, so I also left arm holes that I could use as the basis for building arm cylinders off of them. The first experiment seemed OK, although it's a little too easy to knock it over backwards. (AA battery shown for scale).

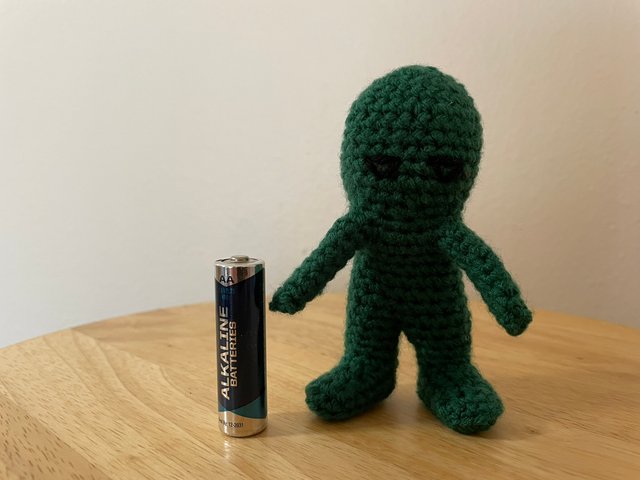
I wanted to try a different arm technique and get some more practice with the legs so I did a second full-body experiment. The arm attachment worked a lot better on this one but they're not really positioned in a good place, so one aspect of the new arm design was good but the other needs work. I had thought the having the arms be more forward-oriented would put more of the center-of-mass over the flat parts of the feet and help with stability, but if that is helping it wasn't enough to counteract other effects because this one is even less stable than the first. (Plus getting the bottoms of the feet to be flat rather than bulging out a bit is a bit tricky).
So I think I've made some good progress on figuring out a foot design, but it still needs work. I'm probably going to experiment with a foot that spreads out a bit all around to create a larger flat surface, plus keep tweaking the arms, and maybe also look into getting the neck to be a bit narrower.
!upvote 15
💯⚜2️⃣0️⃣2️⃣4️⃣ Participate in the "Seven Network" Community2️⃣0️⃣2️⃣4️⃣ ⚜💯.
This post was manually selected to be voted on by "Seven Network Project". (Manual Curation of Steem Seven).
the post has been upvoted successfully! Remaining bandwidth: 170%
Your post has been rewarded by the Seven Team.
Support partner witnesses
We are the hope!